Custom Encoder for Unity Recorder
Unity’s Recorder allows you to capture gameplay videos as H.264, WebM, or ProRes. If you want a different format, you can transcode from one of those or build your own Recorder plugin. The forthcoming Recorder version 4 adds a third option that allows you to implement your own custom encoder. Let’s take a look at how to do that.1
First we’ll install Recorder v4 in our project. At present it’s a preview package (4.0.0-pre.3) and won’t automatically appear in the package manager until you open Project Settings > Package Manager and turn on “Enable Pre-release Packages”.

Let’s suppose we want to save HVEC (H.265) files. I don’t want to write an HVEC encoder from scratch — not that I can’t, I mean how hard can it be, easy peasy right? — but fortunately we can use FFmpeg to do the heavy lifting. All we need to do is wire up our custom Recorder encoder to pass raw video data to an FFmpeg process.
We need one class that implements IEncoder and another that implements IEncoderSettings. Let’s start with the latter. It requires that we supply details about the output format.
[DisplayName("HVEC (H.265) Encoder")]
[EncoderSettings(typeof(HVECEncoder))]
class HVECEncoderSettings : IEncoderSettings
{
    public bool CanCaptureAlpha => false;
    public bool CanCaptureAudio => false;
    public string Extension => "mp4";
    public TextureFormat GetTextureFormat(bool inputContainsAlpha) => TextureFormat.RGB24;
    public bool SupportsCurrentPlatform() => true;
    public void ValidateRecording(RecordingContext ctx, List<string> errors, List<string> warnings) {}

    public string ffmpegPath = "/usr/local/bin/ffmpeg";
}
I also added an ffmpegPath field so that we can specify the location of the FFmpeg executable. Homebrew installs it to /usr/local/bin/ffmpeg on macOS, but it may be elsewhere on your machine. If I were distributing a package with our custom encoder I’d be tempted to bundle FFmpeg builds with it rather than requiring that the user install it themselves.
Now onto the more interesting IEncoder. We need to implement four functions:
OpenStreamCloseStreamAddVideoFrameAddAudioFrame
OpenStream runs when the recording starts, AddVideoFrame runs every frame, and CloseStream runs when the recording stops. For this example I’m going to ignore audio.2
In OpenStream we set up an FFmpeg process with command line arguments that tell it to take raw video data via stdin and output an MP4 file using libx265. “Wow, it’s not remotely obvious which combo of arguments makes this happen,” I hear you say. Yep, I’m with you.
public void OpenStream(IEncoderSettings settings, RecordingContext ctx)
{
    var hvecEncoderSettings = settings as HVECEncoderSettings;

    process = new Process
    {
        StartInfo = new ProcessStartInfo(hvecEncoderSettings.ffmpegPath)
        {
            Arguments = string.Join(' ',
                "-y", // Overwrite existing file

                // Input options:
                "-f rawvideo",
                "-framerate", (float)ctx.fps.numerator / ctx.fps.denominator,
                "-pixel_format rgb24", // Match output of HVECEncoderSettings.GetTextureFormat
                "-s", $"{ctx.width}x{ctx.height}",
                "-vcodec rawvideo",
                "-i -", // Read from stdin

                // Output options:
                "-codec:v libx265",
                "-pix_fmt yuv420p",
                "-vtag hvc1", // Tell QuickTime that it can play this file
                ctx.path),
            CreateNoWindow = true,
            RedirectStandardInput = true,
            UseShellExecute = false,
        },
    };

    process.Start();
}
CloseStream is mercifully more straightforward — simply close the stdin stream then the FFmpeg process itself.
public void CloseStream()
{
    process.StandardInput.Close();
    process.WaitForExit();
    process.Close();
    process.Dispose();
}
Now for AddVideoFrame. Also simple. Take the byte array that represents a single frame and write it to the stdin stream.
public void AddVideoFrame(NativeArray<byte> bytes, MediaTime time)
{
    var stream = process.StandardInput.BaseStream;
    stream.Write(bytes.ToArray(), 0, bytes.Length);
    stream.Flush();
}
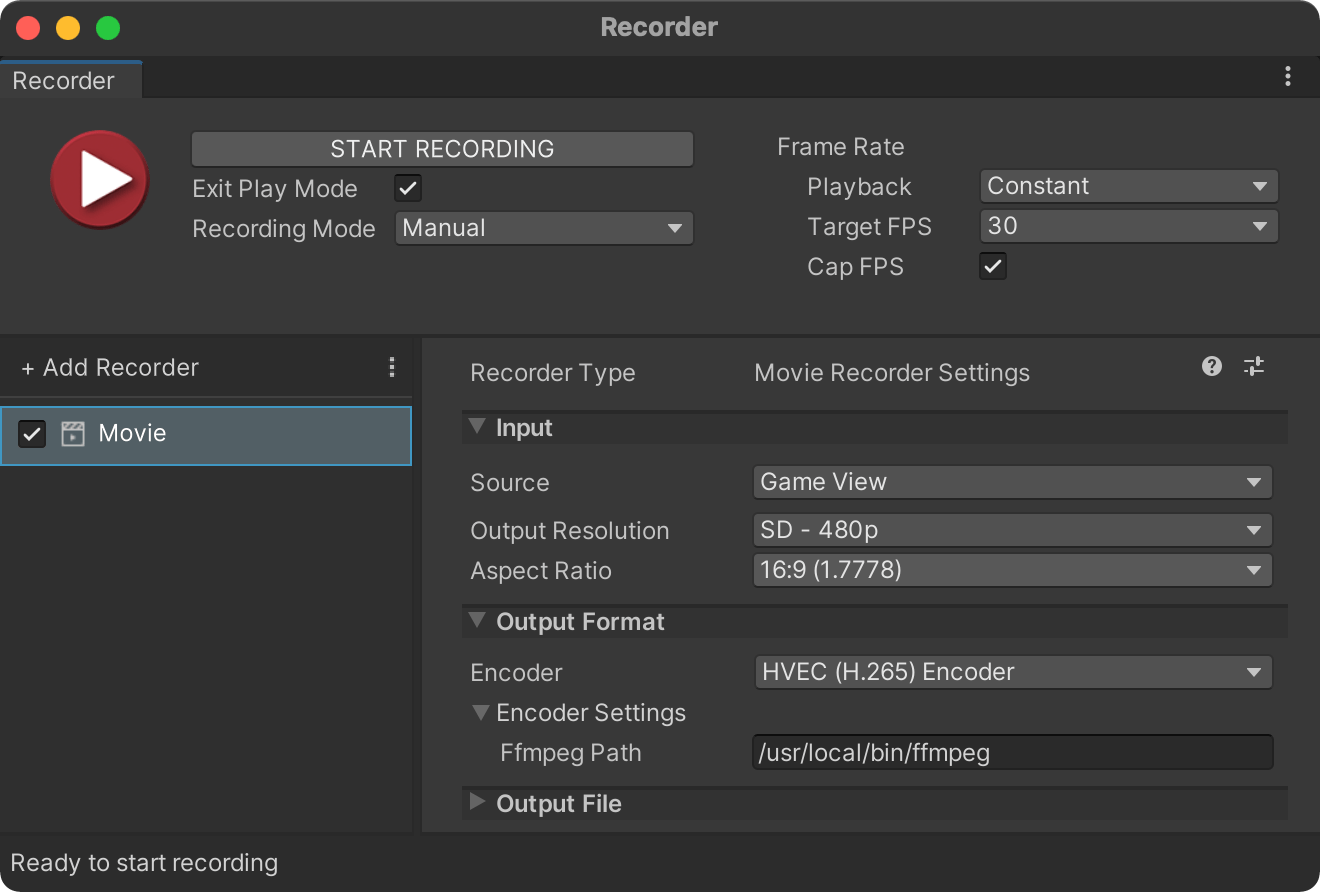
With our IEncoder and IEncoderSettings implementations complete we see a new option named “HVEC (H.265) Encoder” in Recorder’s Encoder field.

And if we did everyting right it spits out an HVEC file when we start recording.
This is a bare-bones example — no error handling, no threading, no control over encoding quality or other fanciness — but let’s not get greedy.
I’m unsure if you can simultaneously record audio and video with one FFmpeg process. What you might do instead is use two processes, one to encode video and another for audio, then merge them together when recording stops. ↩